The Layout Manager is an optional ,advanced tool that gives you a visual preview of how your finished pieces fit on your Material. It helps you maximize Material usage, quickly identify any waste, and, when you’re using Cost-Plus pricing, review pricing options for the waste portion as well.
Table of Contents
Enabling Layout Manager
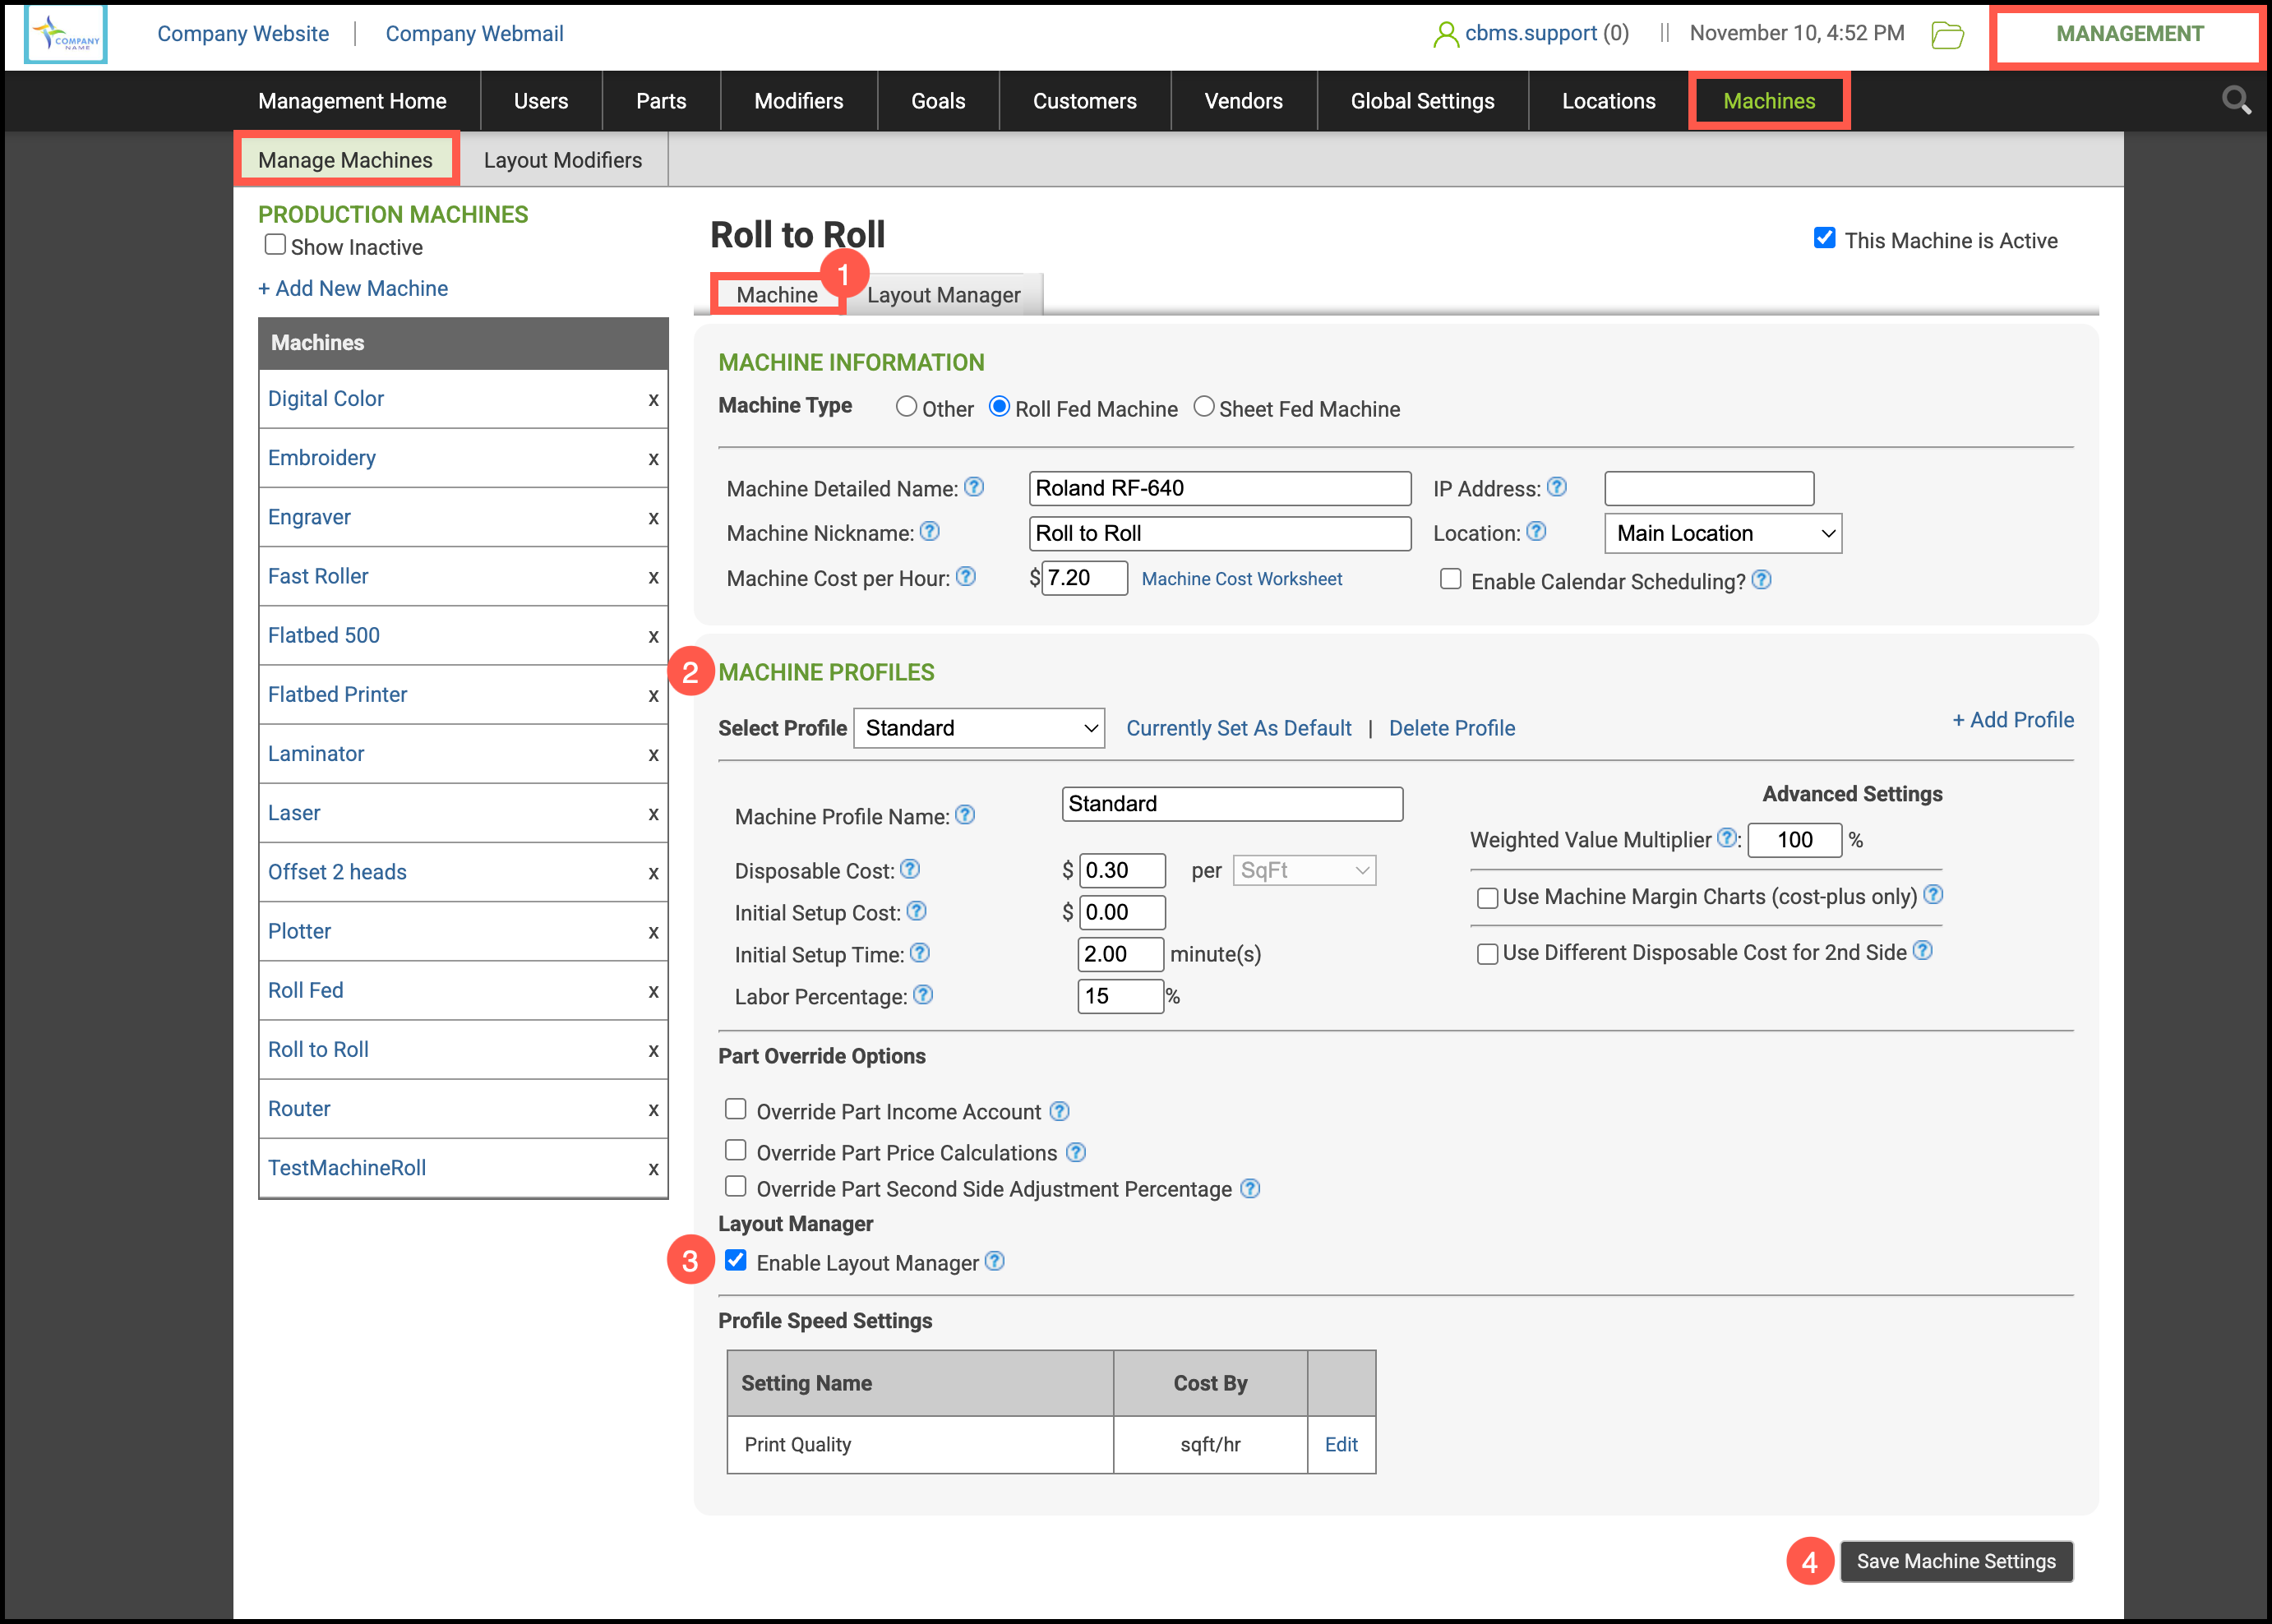
Navigate to Management Module / Machines / Manage Machines and select the appropriate Machine or create a new Machine by clicking Add New Machine.
Note: Each Machine can have multiple profiles. You may choose to have one profile which uses the layout manager, and one that does not.
1. Select the Machine tab.
2. Select or add a Machine Profile.
3. Click Enable Layout Manager.
4. Click Save Machine Settings.
Layout Manager
1. Once the profile has been updated, click on the Layout Manager tab.
2. Enter the Layout Margin which is the unprintable area around the edges of the material. This will be taken into account when the system lays out the finished items.
3. Enter the Maximum Width of the Machine.
4. Enter the Leading Edge, how much material is not printable due to a gripper or leader needed on the Machine.
5. If your machine prints a Color Bar, enable it by entering the width of the color bar. To disable, select None.
6. Select the Orientation from the dropdown menu.
Note: For sheeted Machines with a leading edge, choose either Portrait or Landscape. For roll-fed machines choose Roll.
7. Check Custom Waste Calculation to charge for waste.
8. Use the dropdown menus to select the way the waste will be charged and the percentage.
9. Click Save Layout Settings.
Note: Changes made here will affect the final retail price on parts using Cost-plus pricing.
Layout Manager in Order Entry
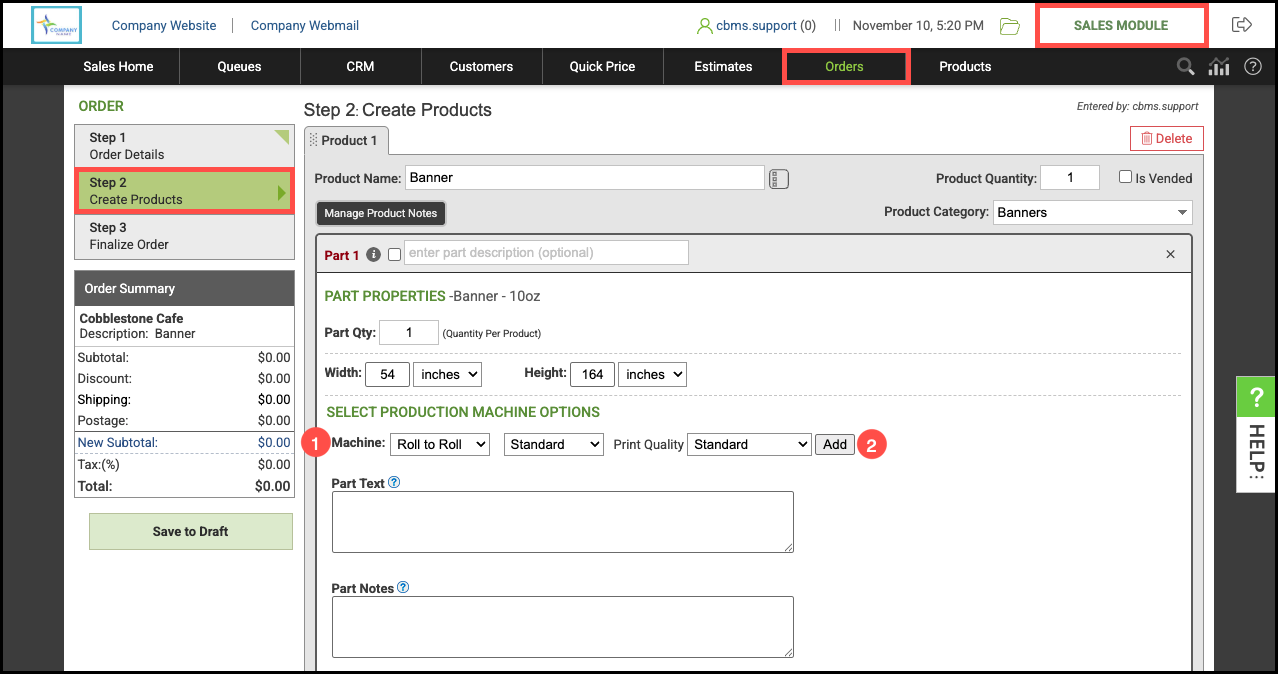
Navigate to the Sales Module / Orders and begin Order creation.
1. Select a Machine and its properties.
2. Click Add.
3. Select the Run / Finish tab.
a. The Leading Edge as set in the Machine Settings.
b. The Machine Margin, or unprintable area around the edges of the Material as set in the Machine Settings.
4. Select the appropriate Options.
a. Checking here will allow you to enter vertical and horizontal Gutter.
b. Setting a Bleed will automatically populate the necessary Gutter.
c. Check this box to remove the Machine Margin and Leading Edge.
d. Checking here will add the cost and retail for cutting to the Order.
e. Rotating the item may allow the job to be laid out more optimally and use less Material.
5. Enter the number of Seams Required.
6. Enter the number of Finished Cuts needed to remove the Part from the Material.
7. Click Save & Close.
