A Modifier Property is what defines how this Modifier will interact with the Part it is associated with. You will select Interface Items which will allow users to determine if and how this Modifier is applicable to the associated Part. You can create multiple properties for a single Modifier. This allows for great flexibility and accuracy in both pricing and production. After chosing an Interface Item you will assign a value to it and give it a label by which all users will identify it. You will then be able to use this new property in your pricing formula.
A Modifier Property establishes the relationship between the modifier and the part. It determines whether and how the modifier applies, based on user input during order entry. You can assign multiple properties to a single modifier to handle a variety of production or pricing scenarios.
Understanding Interface Items
To help you determine which Interface Item is appropriate, think of what you would ask your customers when ordering a product with this modifier. Each question you would ask in regards to this modifier should typically have its own Interface Item. The type of item you should choose would depend on that question as well.
| Question Type | Recommended Interface Item | Example |
|---|---|---|
| Yes/No question | Checkbox | Do you want overlap on the top of your product?” |
| Open-ended response | Textbox | What custom text should appear on this product? |
| Limited set of options | Dropdown | Select material type: Matte, Gloss, or Satin. |
Each Interface Item requires a label (the name users will see) and a value (used in pricing formulas). This structure ensures consistency and accuracy throughout your pricing and production workflows.
Adding a Custom Property
Navigate to the Management Module / Modifiers / Modifiers and select the appropriate Modifier.
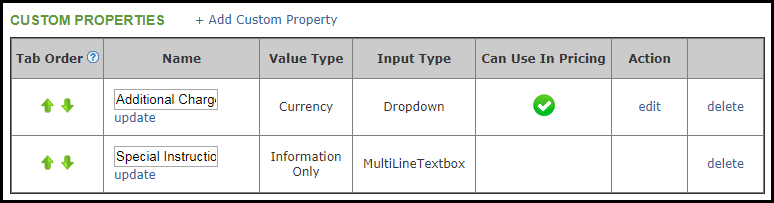
1. Select the Custom Properties tab.
2. Click Add Custom Property.

3. Click View Instructions if desired.
Note: These instructions are available throughout the process if you need to refer back to them.
4. Select the Interface Item.
Note: The following pop-ups will differ slightly depending on the interface chosen. This article uses Dropdown as the example.

5. Select the value.

6. Enter a Property Label.
7. Click Add Template Item.

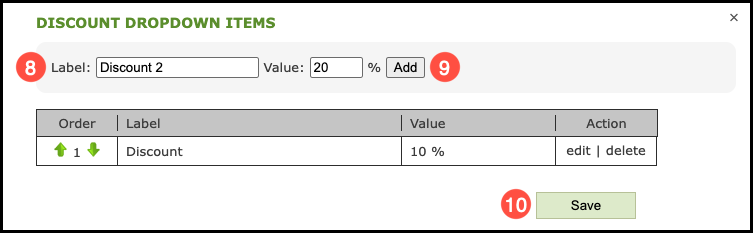
For Dropdowns:
8. Label your dropdown options.
9. Click Add.
Note: Repeat for all necessary dropdown options.
10. Click Save.
Note: Values such as a Currency can be used your pricing formula. Information Only cannot be used in pricing.