You can easily add new Users to your system and manage their access permissions individually. Each User record also allows you to include additional details for reference, helping you maintain clear and organized user management across your organization.
Table of Contents
Adding New Users
Navigate to Management Module / Users / Add New User.
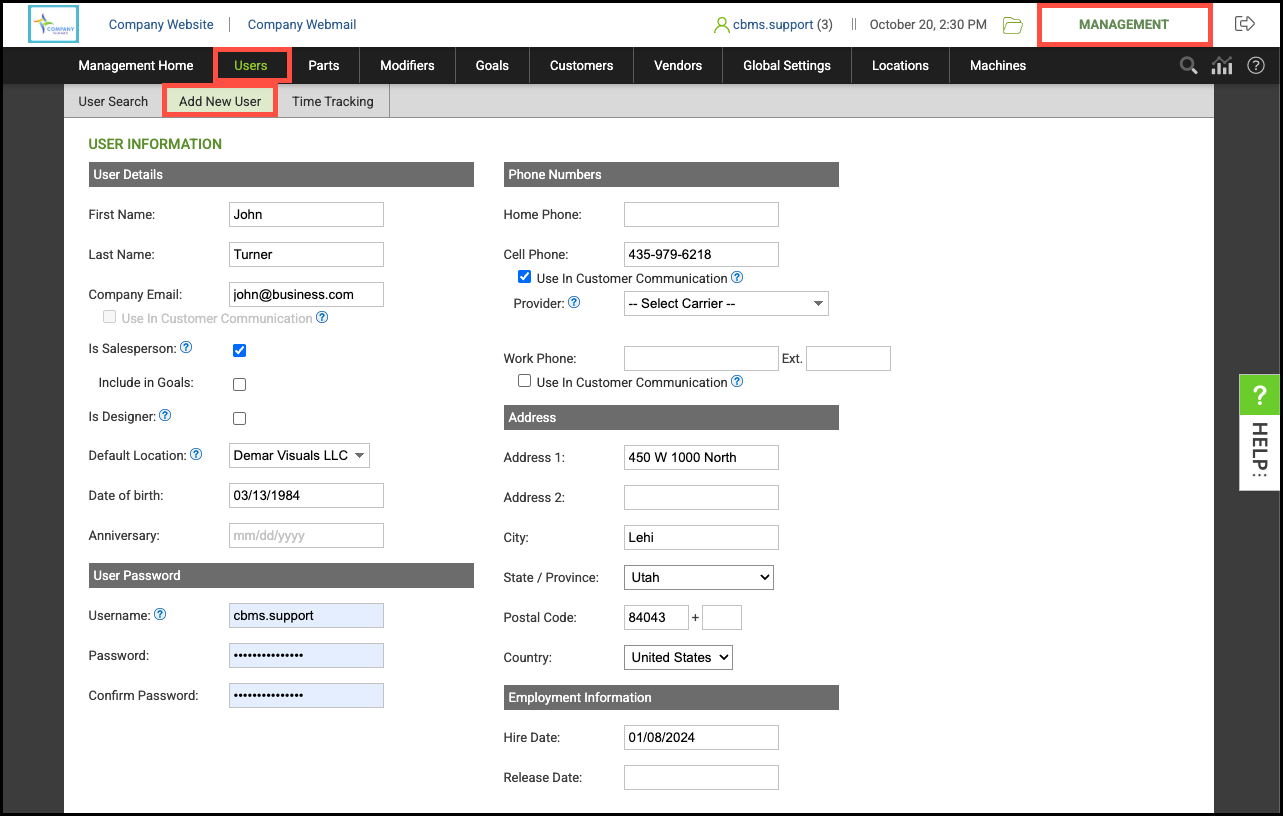
User Information
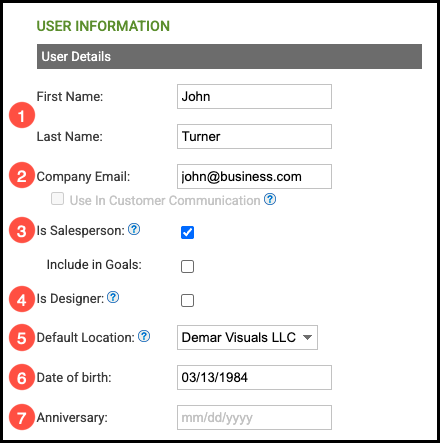
User Details
Fill in the pertinent details for this User. Required fields are indicated.
1. Enter a First and Last Name.
2. Enter an Email.
Note: To have the option to use this in Customer Communication, you must first enable that setting in Global Settings / Domain / Email Settings.
3. Check if this person is a Salesperson and additionally, if you would like them included in Sales Goals.
4. Check if this person is a Designer.
5. Select a Default Location.
6. Enter a Date of Birth if desired.
7. Enter an Anniversary if desired.
User Password
8. Enter the Username. This should be something that easily identifies the individual.
Note: For example, follow the format of FirstInitial.Last Name (J.Turner).
9. Enter a Password and confirm.

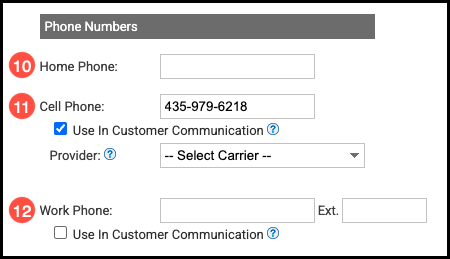
Phone Numbers
10. Enter a Home Phone number if desired.
11. Enter a Cell Phone and indicate if this number will be used for Customer Communication.
12. Enter a Work Phone if desired.
Note: These settings must be enabled in Customers / Communication / Communication Settings. For more information, please see Managing Phone Number Visibility.
Address
13. Enter the User's Address information if desired.

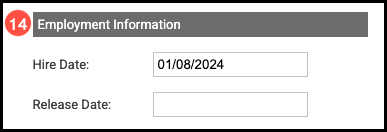
Employee Information
14. Enter employment dates, if desired.
Access Rights
15. Define the user as a Non-Admin User or System Administrator.
Note: System Administrators will have access to the entire system.
16. If the user is a Non-Admin, select a Predefined User Role if desired.
Note: This will automatically select this User's permissions.
To enter Permissions manually:
a. Scroll through the list of Modules in the left column and check all that the user can access.
b. Select which Module should be the Start Module, or home screen.
c. Select the specific permissions you would like to grant within each module this employee has access to.

17. Click Create New User.
Emailing User Login Information
Navigate to the Management Module / Users / User Information.
1. Click Email User Login Info.
2. Click Save All User Settings if you have made any edits.
Note: For more information on editing Users, please see User Details.

3. Review the information in the email then click Send Email.
