Part Groups are used to assign common pricing settings across all Parts that are within that Group. This allows you to quickly update some Part information on a number of Parts all at once.
Table of Contents
Navigate to Management Module / Parts / Manage and select the appropriate Part.

General Tab
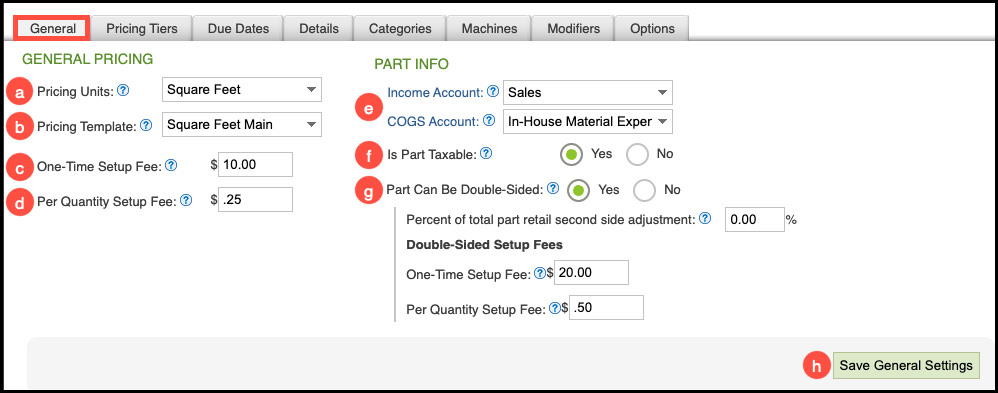
These settings define the overall pricing rules for all Parts within a Group. Any Settings or Fees configured here are automatically applied to every Part in the Group, ensuring consistent pricing and fee structures across related items..
a. Unit of measurement for all Parts in this Group.
b. Pricing Template assigned to the Parts in the Group.
c. One-Time Setup Fee
d. Per Quantity Setup Fee is applied per Part Quantity and is added to the One-Time-Setup fee if it is not a double-sided Part.
e. Current Income and Cost of Goods Accounts assigned to this part group. You can change these accounts by selecting a new account from the dropdown menu if needed.
f. Is Part Taxable. Select Yes or No to indicate if all Parts in this group are taxable. This can be overridden on an order, estimate, or customer level.
g. Can Part be Double Sided. Click Yes if all Parts in this group can be double-sided. Click No if they cannot be double-sided.
- If your Part is priced using Market-Based Pricing, enter the percent of Part Retail you wish to charge.
If you are using Cost-Plus Pricing, second side costs are automatically calculated by adding an additional machine, disposable, and labor costs incurred. This will automatically increase the price for the second side, and typically no further adjustment is needed.
- Add a one-time double-sided setup fee and/or a per quantity setup fee.
h. Changes made to this screen must be saved by clicking Save General Settings.
Pricing Tiers Tab
In this section, you’ll define how pricing is calculated for a Part or Part Group by selecting one of three pricing methods: Cost-Plus, Market-Based, or Global Tier pricing. Each method offers a different approach to managing margins and retail values, allowing you to align your pricing strategy with your business model.
After choosing your preferred pricing method, you can set the corresponding values - such as markups, margins, or tier-specific prices - to ensure consistent and accurate pricing across your system.
For more information, please see Cost-Plus Pricing Tiers for Parts, Market-Based Pricing Tiers for Parts, or Global Pricing Tiers.
1. Select Pricing Method and fill in the appropriate pricing information.
2. Click Save.
Note: Each screen will vary slightly depending on Pricing Method chosen.

Due Dates Tab
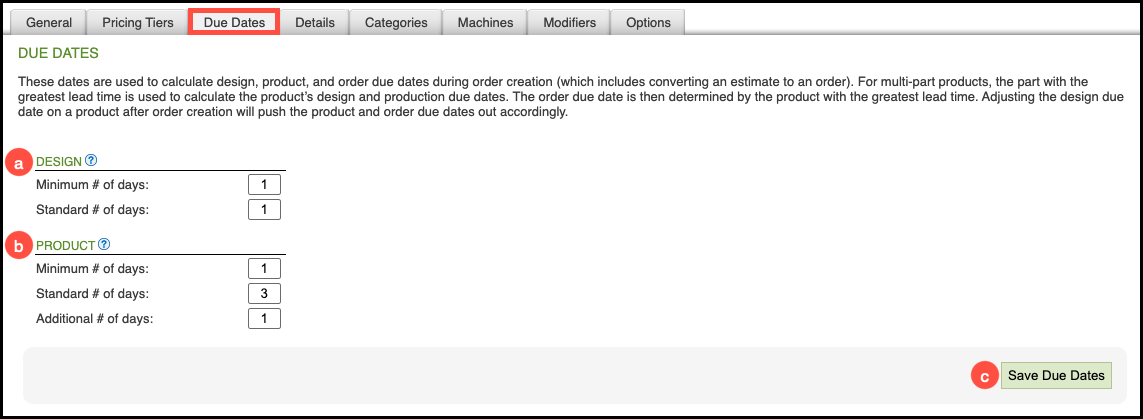
Use this section to define the default number of days required to complete various Part production processes. These defaults help establish consistent scheduling and timeline expectations across your system.
During order creation—including when converting an estimate to an order—CoreBridge automatically calculates Design, Product, and Order due dates based on the standard timelines you’ve defined.
For multi-part products, the system uses the part with the longest lead time to determine the product’s design and production due dates. The order due date is then based on the product that requires the most time to complete.
When setting due dates, the system follows this sequence:
The Design Due Date is calculated using the Standard # of Days for Design.
The Product Due Date is calculated by adding the Standard # of Days for Production and any Additional # of Days to the Design Due Date.
If you adjust a Design Due Date after an order has been created, the corresponding Product and Order Due Dates will automatically shift forward to maintain proper scheduling alignment.
Note: You can still customize Due Dates for individual Orders during order entry when specific jobs require different production times.
a. Design - This is the number of days to design the Product after the Order is created.
- Minimum is the fewest amount of days allowed.
- Standard is the usual number of days taken.
b. Product - The number of days to produce a Product after the design due date.
- Minimum is the fewest amount of days allowed.
- Standard is the usual number of days taken.
- Additional is any additional time needed added to the standard.
Proof Approval Due Dates
This setting allows you to automatically push the product due date when the proof is approved. This feature is disabled by default. The setting is found in Management Module / Global Settings / Ordering / Due Dates.
Enabling this option will automatically recalculate the Product’s due date based on part lead times when the status changes to PROOF APPROVED.
- Products with hard due dates are excluded from the date recalculation.
- If the order has a hard due date, then the product due date will not update beyond the order’s hard due date.
- If the order does not have a hard due date and the new product due date will be greater than the existing order due date, then the order due date will also be pushed out.
- If the proof is approved before the proof due date, it will not update the amount of time set for the product due date.
Details Tab
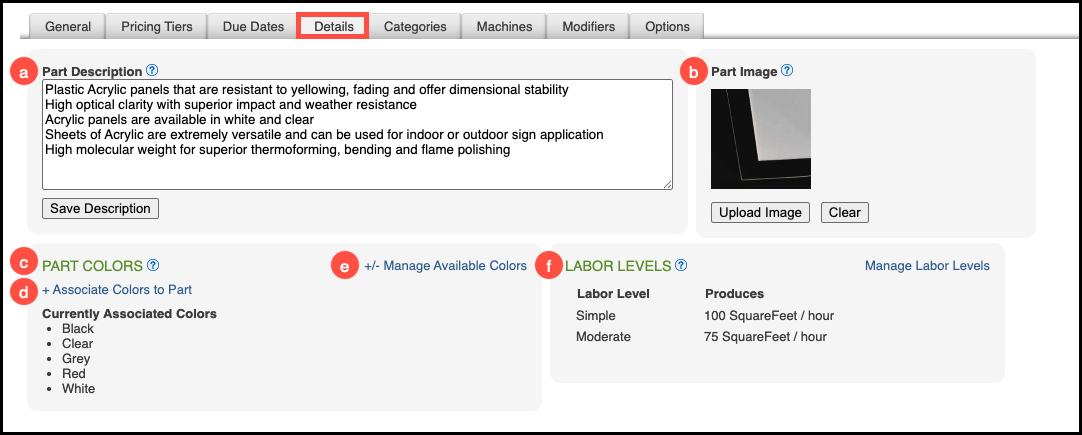
a. Part Description - Standard information for this Part and all Parts within the same Group. Click Save Description when finished.
Note: The description entered here is for internal use only and will be available during Order entry and on digital Work Orders.
b. Part Image - The image uploaded will be common for all Parts within this group, if applicable.
Note: This image is for internal use only and will be available during Order entry and on digital Work Orders.
c. Part Colors - Enables a drop-down during Order entry where the user can select the color of this specific part. Users will only be able to select one color. This should be used to select the color of the actual Part, not any image or design colors.
Note: Only use this setting if you do not track colors separately in inventory and if color does not affect price.
d. Associate Colors to Part - Assign specific color selections for this Part or Part Group only.
Note: Setting Part Colors will not affect price or inventory.
e. Manage Available Colors - Set color options for all Parts using this feature.
f. Labor Levels - Manage labor costs which are above and beyond your standard labor. You can set up multiple levels of labor depending on the part.
Example: "Simple," "Moderate," "Complex," are labels that might be used. This feature will affect Part Cost only when using Market-Based Pricing. It will affect Part Cost and Retail Price when using Cost-Plus Pricing. These costs will be tracked in the pricing information area of any order and listed under Part Labor.
Note: This feature should only be used on labor-intensive parts.
Categories Tab
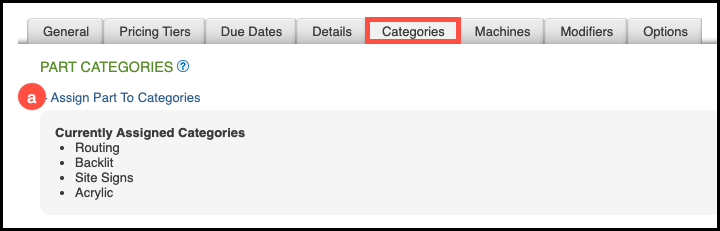
Assigning Categories to a Part makes it easier for users to locate that Part within both the Management and Sales Modules. When you assign a category to a Part that belongs to a Group, the same categorization is automatically applied to all Parts in that Group for consistency.
A single Part can also belong to multiple Categories, allowing greater flexibility in how Parts are organized and searched across the system.
For more information, please see Part Categories.
a. Assign Part to Categories - Assign or edit Categories for this Part.
Note: To create new Categories, click the Part Search button above, then click the Manage Categories link inside the header.
Machines Tab
In this section, you can add or update production machines linked to a specific Part or Part Group. Associating machines helps ensure accurate tracking of machine costs, labor, and disposable materials, while also allowing you to filter products by machine in production queues for smoother workflow management.
Note: In order to utilize machine tracking and filtering during Order entry, make sure to associate the appropriate machines here first.
For more information, please see Creating Machines.
Associating a Machine
1. Click on Associate Machines to This Part.
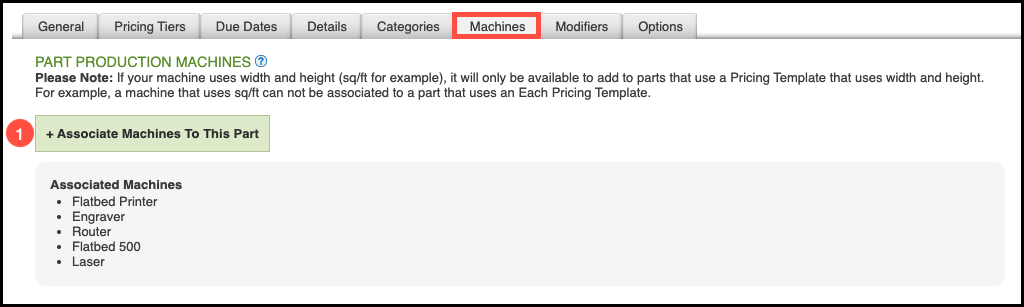
2. Select any Machines that would be used to produce this Part or any Part within this Group.
Note: You may select multiple machines as necessary during Order entry.
3. Click Update.

Modifier Tab
In this section, you can associate commonly used Modifiers with a specific Part or Part Group. Adding Modifiers here ensures they are readily available by default when sales staff create orders, helping streamline the order entry process and maintain pricing consistency. For more information, please see Creating Modifiers Overview.
Note: Unlike Machines, Modifiers can also be added to a Part during Order entry if additional options or adjustments are needed.
Associating Modifiers
1. Click Associate Modifiers To This Part.

2. Select the Modifiers you want for this Part.
3. Click Update.

Options Tab
In this section, you can define Size-Based Discounts for a Part, applying price adjustments based on either the size of each individual item or the total combined size of all items. The Options tab is available only for Parts and Part Groups that use size-based pricing.
Note: Size-Based Discounts are applied after all other pricing calculations - including quantity and tier discounts - so it’s important to review these values carefully to ensure accurate final pricing.
Using Size-Based Discounts
1. Enter the Discount percentage.
2. Enter the starting Square Feet.
3. Click Add.
4. Select whether the discount applies to the size of each item or the size of all items.
Note: Repeat these steps as needed to add multiple discount levels.
5. Click Save Discounts.
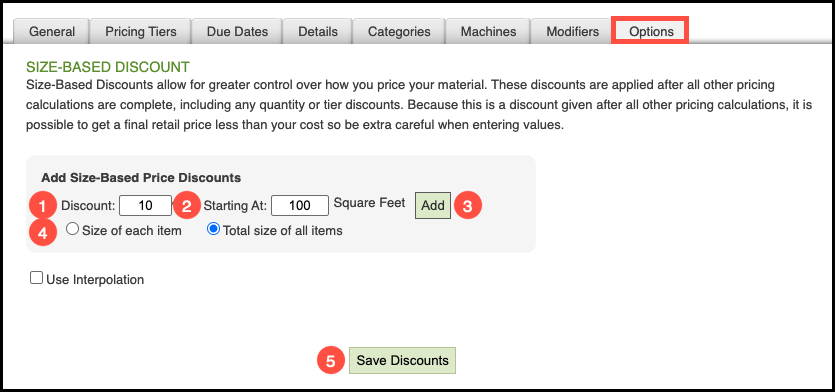
Note: When using multiple levels of discounts, checking the Interpolation box will spread the discount evenly across each level. This means that for each additional sq. ft., a small discount percentage will be added.
Example: If a customer orders 100 sq. ft. of this part but the next discount is set at 125 sq. ft., the customer will still receive an incremental discount without purchasing the additional 25 sq. ft.
Related Articles
Cost-Plus Pricing Tiers for Parts
Market-Based Pricing Tiers for Parts