This article explains how to connect CoreBridge with QuickBooks Online using Summary Sync. Summary Sync sends financial data one way - from CoreBridge to QuickBooks Online - using journal entries created from CoreBridge reconciliations.
Important Details
- You may complete setup before your CoreBridge system is Live.
- No data will sync until the system is marked Live and all sync requirements are met.
- Reconciliation and sync are separate processes and must be initiated independently.
- Completing a reconciliation does not automatically trigger a sync.
Table of Contents
Before You Begin
Review the following information before starting setup.
- Setup may be completed prior to going Live, but syncing should not occur until the system is Live.
- Do not reenter orders or payments in CoreBridge if they already exist in another system. This may result in duplicate data.
- If your CoreBridge system includes multiple locations:
- All locations sync to a single QuickBooks company.
- Each location appears in QuickBooks as a Class.
- Reconciliation and sync are separate processes:
- Reconciliations must be completed before data can sync.
- Sync must be initiated after reconciliations are completed.
Sales Tax Reporting
The QuickBooks Sales Tax Report does not work with Summary Sync. QuickBooks does not pull sales tax data from journal entries.
Use CoreBridge sales tax reports when preparing sales tax filings.
Sync Requirements
Before a sync can occur, all of the following must be true.
- You have an active QuickBooks Online subscription:
- Simple Start
- EasyStart (Canada)
- Essentials
- Plus
- Advanced
- Summary Sync is selected as the export method.
- If you have multiple locations, your QuickBooks version supports Class Tracking.
- Your CoreBridge system is Live and includes:
- At least one reconciliation with payments
- At least one reconciliation with income
1. Perform CoreBridge Reconciliations
Each CoreBridge reconciliation creates one journal entry in QuickBooks. If reconciliations are not completed, no data will sync.
For more information, please see Reconciliation Overview.
Best Practices
- Perform reconciliations at the end of each day.
- Ensure all payments have been entered.
- Confirm orders are marked Completed before reconciling.
- Catch payment errors quickly.
- Align CoreBridge totals with merchant deposits.
- Maintain clean month-end reporting.
2. Configure QuickBooks Online
Configure QuickBooks using the QuickBooks Online Application Settings for Sync. These settings ensure journal entries post correctly and help prevent sync errors.
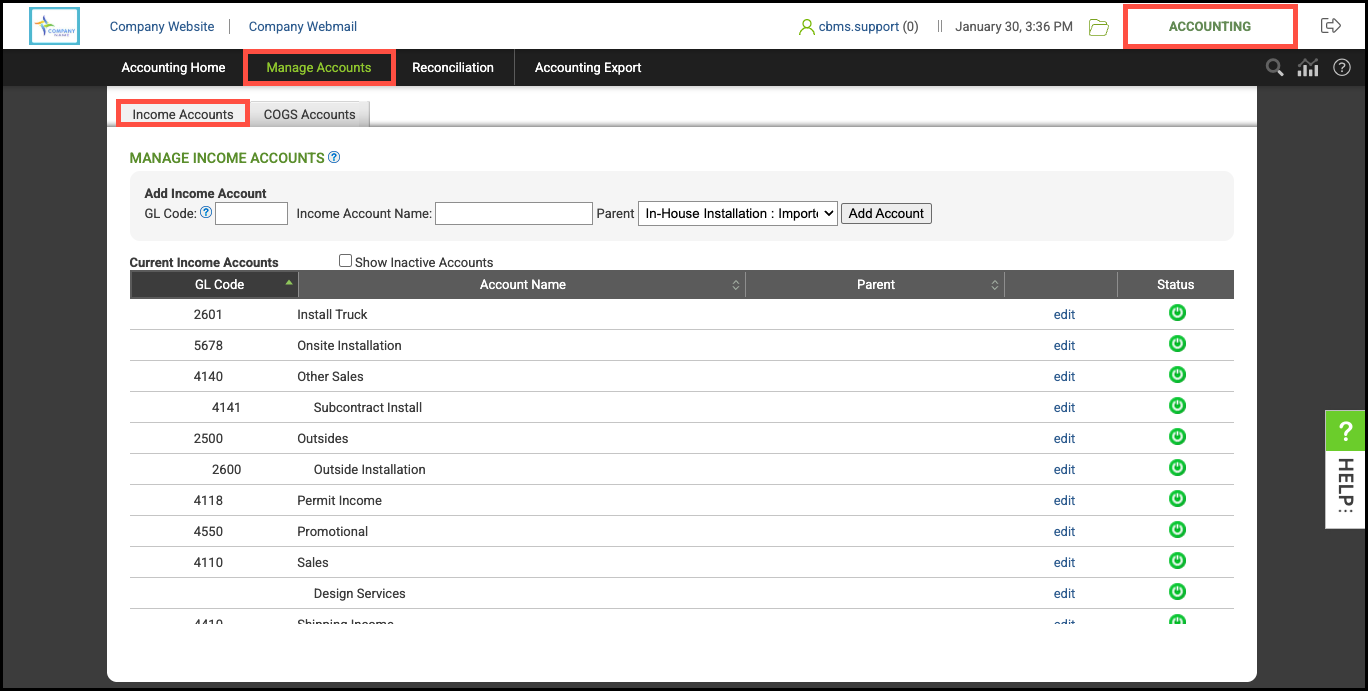
3. Match Income Accounts
Navigate to Accounting Module / Manage Accounts / Income Accounts.
Key Rules
- Income accounts used by CoreBridge must exist in QuickBooks.
- If an account exists only in CoreBridge, it will be created automatically in QuickBooks during the first sync.
- If the account exists in both systems, the following must match exactly:
- Account number
- Account name
- Account hierarchy
- Account type
- Account type must be Income, not Other Income.
Account Naming Guidelines
- Use letters and numbers only.
- Avoid special characters such as $, &, or quotes.
- Do not name an account “Shipping.”
- Use Shipping Income or Shipping Expense instead.
- Limit account hierarchy to a maximum of three levels.
- Account names and account numbers must be unique.
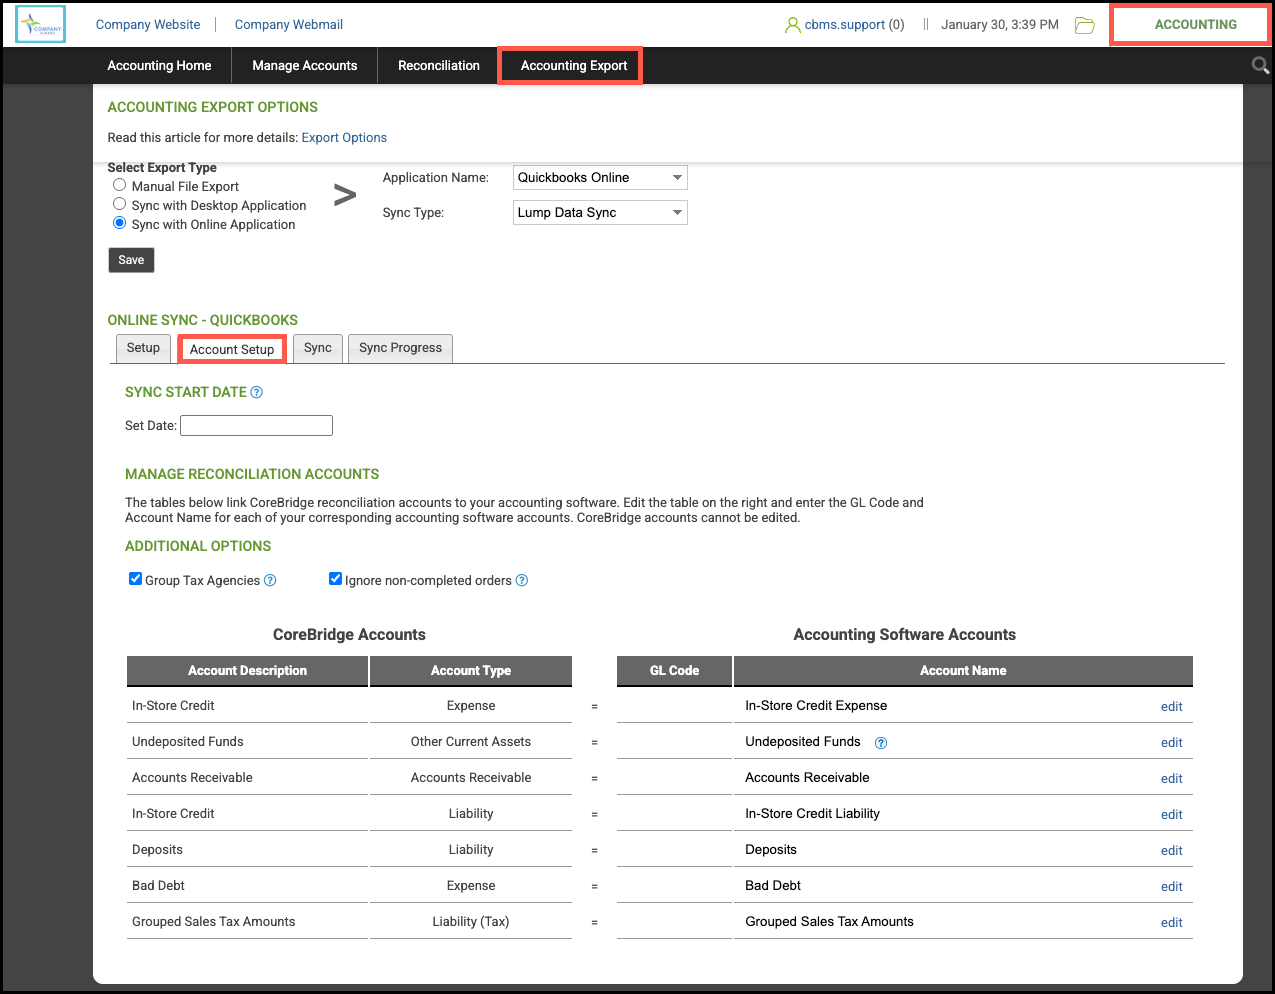
4. Match Reconciliation Accounts
Navigate to Accounting Module / Accounting Export / Account Setup.
Ensure reconciliation accounts are aligned between CoreBridge and QuickBooks. The goal is to match the accounts in the Accounting Software Accounts section to QuickBooks.
- The CoreBridge Accounts column is for reference only.
- If an account exists in both systems, verify the number, name, type, and hierarchy match exactly.
- If an account exists only in CoreBridge, it will be created automatically in QuickBooks during the first sync.
- Limit account hierarchy to three levels.
- Do not use special characters in account names.
Undeposited Funds Account
The Undeposited Funds account in QuickBooks:
- Must match exactly between CoreBridge and QuickBooks.
- Must use the QuickBooks system Detail Type: Undeposited Funds.
As long as the account name matches and the Detail Type is Undeposited Funds, the account will work correctly.
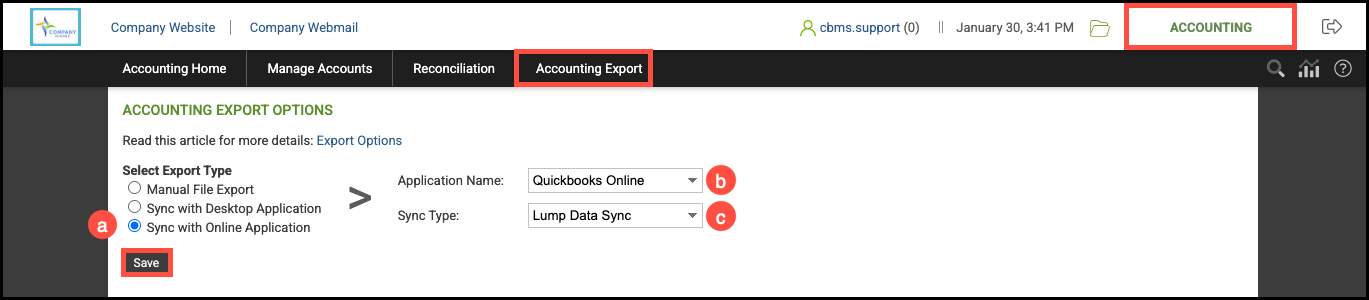
5. Select the Accounting Export Option
This step is required unless it has already been completed by Support.
Navigate to Accounting Module / Accounting Export and configure the following:
a. Export Type: Sync with Online Application
b. Application Name: QuickBooks Online
c. Sync Type: Lump Data Sync
Click Save.
Note: If you have previously synced CoreBridge using a different accounting application or export method, stop and contact Support before proceeding to avoid data conflicts or duplicate entries.
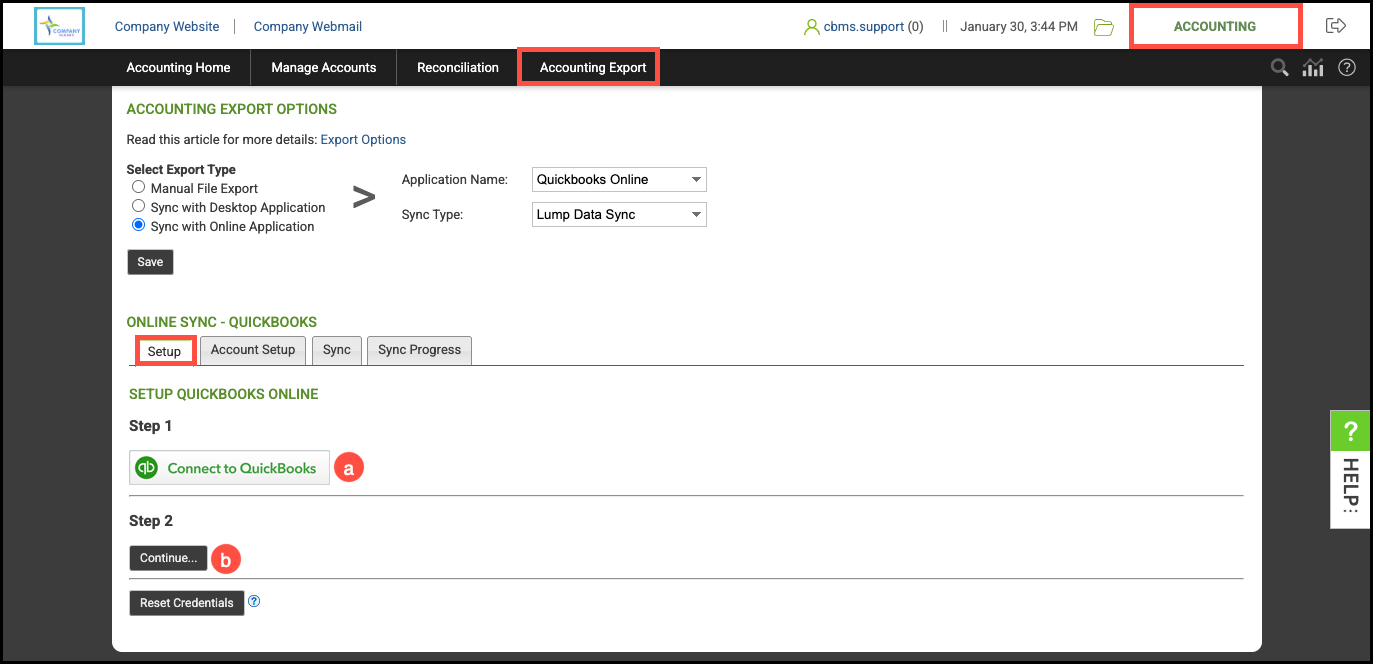
6. Authorize CoreBridge Sync with QuickBooks
For more information, please see QuickBooks Online: Authorize CoreBridge Sync with QuickBooks.
Navigate to Accounting Module / Accounting Export / Setup.
a. Under Step 1, select Connect to QuickBooks.
- Log in using your Intuit or QuickBooks credentials.
- Select the QuickBooks company you want to sync to.
b. Under Step 2, select Continue.
- You may briefly see a dialog box flash and disappear. If nothing appears, this is expected.
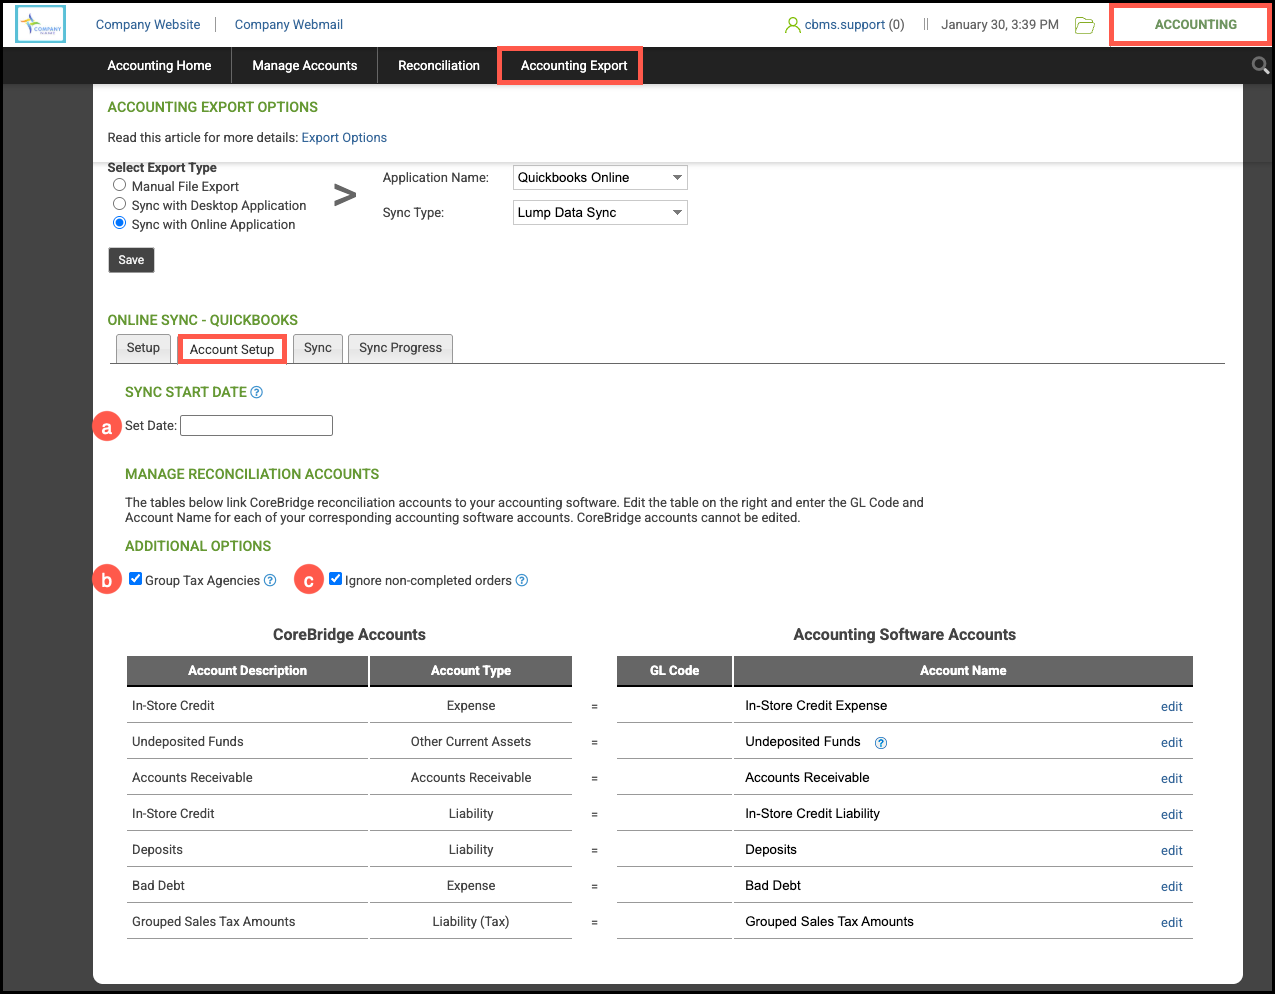
7. Choose Sync Options
Navigate to Accounting Module / Accounting Export / Account Setup.
a. Sync Start Date
The Sync Start Date determines which transactions are sent to QuickBooks.
- Only transactions on or after this date will sync.
- Reconciliations prior to this date are excluded.
- This date should match the first reconciliation you want to sync.
Note: If you are taking over an existing system or previously synced using a different accounting system or sync type, contact Support before proceeding to avoid missing or duplicating data.
b. Group Tax Agencies
Controls how sales tax is posted to QuickBooks.
- Required if using:
- Pressero
- TaxJar
- Avalara
- Recommended when all sales tax is remitted to a single tax authority.
c. Ignore Non-Completed Orders
Determines whether WIP, Built, and Orders Not Complete values are included in QuickBooks.
- This is a one-time setting.
- Must be selected before the first sync.
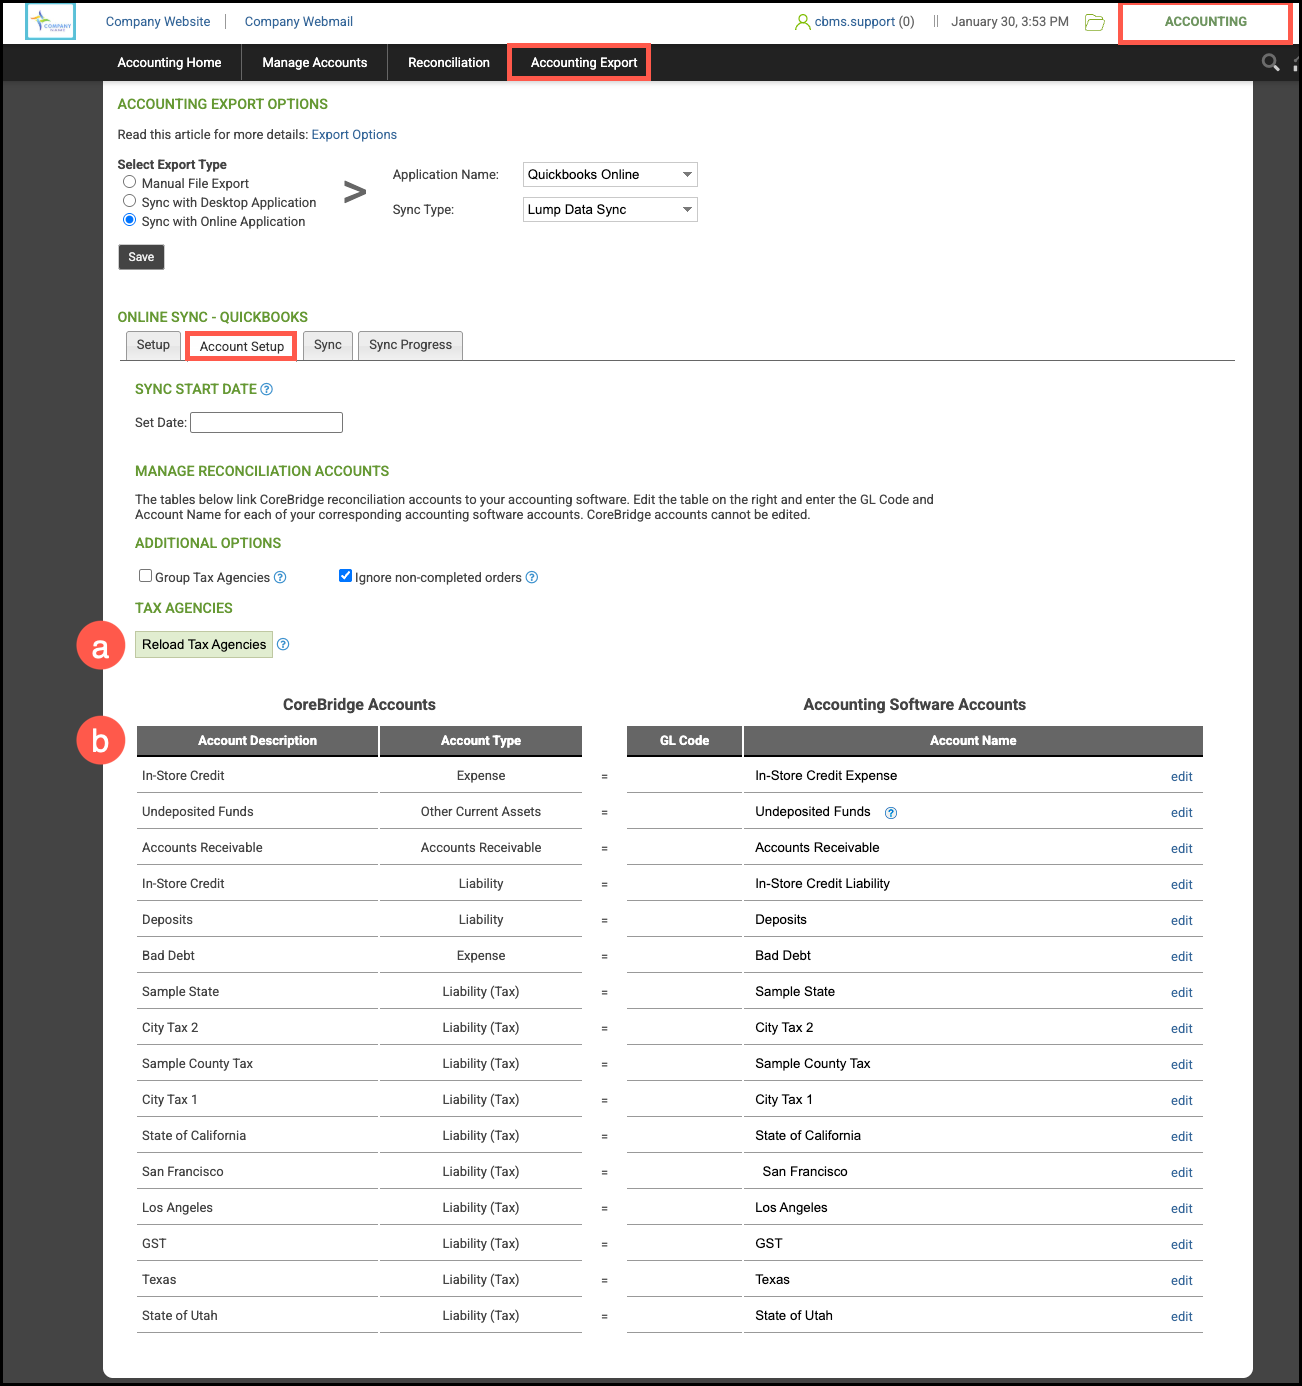
8. Configure Tax Agencies
Note: This step is required only if Group Tax Agencies is not enabled.
Navigate to Accounting Export / Account Setup.
a. Select Reload Tax Agencies.
b. Match each tax agency to the appropriate QuickBooks account.
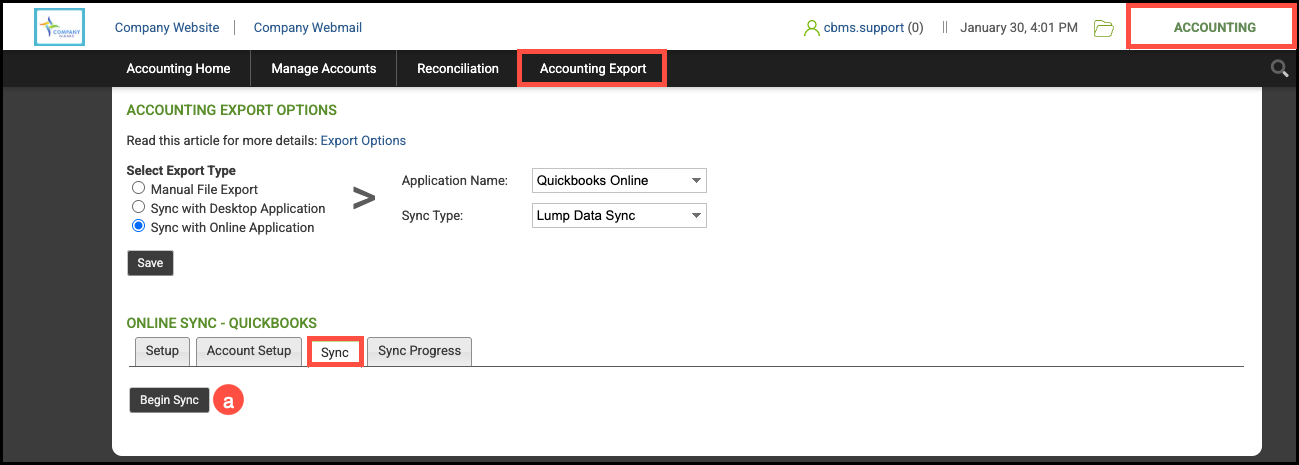
9. Perform Your First Sync
For more information, please see QuickBooks Online: How to Perform a Sync.
Navigate to Accounting Module / Accounting Export / Sync.
a. Click Begin Sync.
Note: Do not interrupt the sync once it has started. Depending on data volume, the initial sync may take several minutes.
Sync Errors
If you encounter sync errors, please see QuickBooks Online: Summary Sync - Reporting Sync Errors to report them:
Related Articles
CoreBridge Accounting Sync - FAQ and Best Practices
How Summary Sync Works - QuickBooks Example
QuickBooks Online: Authorize CoreBridge Sync with QuickBooks
QuickBooks Online: How to Perform a Sync
QuickBooks Online: Summary Sync - Reporting Sync Errors