How Does The Sync Process work?
- Review this entire article as well as any linked articles.
- Complete the setup steps.
- Let support know that the setup has been completed.
- A support agent will review your system.
- Once your system is ready a support agent will send a link to schedule a web meeting.
- A support agent will join you on a web meeting to perform your 1st sync.
Overview
This article will guide you through the process of setting up QuickBooks Online and CoreBridge to prepare for a data sync.
The QuickBooks Online Detail Sync Setup is one of the more involved sync setups. Before performing any actions, you may want to read through the instructions to confirm that you are willing to complete everything and that all of the requirements can be met. The QuickBooks Online Summary Sync is much easier to set up and maintain.
- If you have not Gone Live! with CoreBridge you can still perform these setup steps, however, the actual sync will not occur until you are Live and the sync requirements have been met.
- A CoreBridge support agent will perform the first sync with you on a web meeting. We don't recommend performing the first sync on your own.
- If you are entering orders or payments in a program other than CoreBridge, we recommend not entering that data again in CoreBridge so that you don't get duplicate data in QuickBooks.
- If you are entering payments in a program other than CoreBridge, we recommend keeping those bank deposits separate from your CoreBridge deposits.
- If your CoreBridge system has more than one Location, data from all locations will sync to the same QuickBooks company.
- The sync and the reconciliation are 2 distinct processes. Reconciliations should be performed once your system is Live. The sync will happen after that.
- The sync is one-direction only, from CoreBridge to QuickBooks.
- Once you've gone through your 1st Sync, you should not edit/update/modify/delete any records that sync from CoreBridge to QuickBooks. QuickBooks effectively becomes "look but don't touch" for any records that have synced from CoreBridge. The only exceptions would be manually performing what the sync cannot perform.
Table of Contents
- Sync Requirements
- QuickBooks Online Version Requirements
- Related Articles
- Bank Feed
- E-Commerce Integration Requirements
- Special Characters
- STEP 1 – Perform a CoreBridge Reconciliation
- STEP 2 – Configure QuickBooks Settings
- STEP 3 – Setup Tax Groups and Tax Agencies
- STEP 4 – Select an Accounting Export Option in Corebridge
- STEP 5 – Authorize CoreBridge with QuickBooks Online
- STEP 6 – Confirm and Select Accounts in CoreBridge
- STEP 7 – Match Income & Cost of Goods Sold Accounts
- STEP 8 – Invoice Prefix & Numbering Format
- STEP 9 – Review Employee Names
- STEP 10 – Review Customer Names
- STEP 11 – Review Vendor Names
- STEP 12 – Review Items
- STEP 13 – In-Store Credit (to be completed after the sync)
- STEP 14 – Notify Support that All Setup Steps Have Been Completed
Sync Requirements
Before the sync can happen the following requirements must be met.
- QuickBooks Online subscription. LINK: Accounting Export Options
- The Detail Sync export method is being used
- Your system must be live.
- One or more Completed orders
- One or more payments.
- One or more Reconciliations that contain payments.
QuickBooks Online Requirements
Sales Tax - Non-U.S. versions
Tax must be assigned at the Order level. If your version of QuickBooks assigns tax at the Line Item level, Summary Sync must be used. This is usually the case with VAT and GST tax in non-U.S. countries.Class Tracking - All versions
If your CoreBridge system has more than one Location, you must have a version of QuickBooks Online that supports "Class Tracking". Each Location name from CoreBridge will be used to create a Class in QuickBooks so that you are able to separate each location(store) on reports. Without that feature you will not be able to separate financials by location(store). The "Location" feature in QuickBooks Online is not used for the sync.Purchase Orders - All versions
If your CoreBridge subscription contains the Purchasing Module and you want to sync CoreBridge Purchase Orders to QuickBooks, you must have a version of QuickBooks Online that includes these features:- Create and send purchase orders
- Track inventory
Inventory items - All versions
If your CoreBridge system has Parts or Modifiers of type "Inventoried Part" you must have a version of QuickBooks that has the "Track Inventory" feature.Closed Books
If your books are closed, and you have existing Products and Services in QuickBooks with the same name as Parts and Modifiers in CoreBridge, QuickBooks will not allow your CoreBridge Parts and Modifiers to be mapped. The option named "Close the books" must remain unselected during the first sync.
Related Articles
Please take a few minutes to review these articles. They provide helpful details about the sync process. There are a few things the sync will not do which will require manual work in QuickBooks so you will need to be prepared to handle those.
Bank Feed
If you are using the bank feed in QuickBooks, CoreBridge deposits that import via the bank feed must be handled properly. If not handled properly you will get duplicate data in QuickBooks. If you have not synced from CoreBridge you should not Add those transactions or try to Match them. Just let them sit. They will need to be addressed once you sync. Please review this article for more details: Add and match downloaded banking transactions
3rd Party Integrations
If you are using any of the following 3rd party integrations, you should not use the QuickBooks Online Detail Sync export.
- Pressero
- XMPie
- TaxJar
- Avalara
- The sales tax amount on the CoreBridge order may be a different amount in QuickBooks when the invoice syncs which will cause the sales tax liability in QuickBooks to not match the actual liability from CoreBridge.
- If you need to use any of the noted integrations, we support (a) QuickBooks Desktop Detail Sync, (b) QuickBooks Desktop Summary Sync, (c) QuickBooks Online Summary Sync, and (d) Xero Summary Sync.
Special Characters
These are the characters that are allowed in CoreBridge that may cause the sync to fail: á, é, í, ó, ú, ñ, ü
STEP 1 – Perform a CoreBridge Reconciliation
Is this step optional or required? Required
If your system is live and you have already been performing daily reconciliations, please review READ ME then proceed to Step 2.
READ ME
Each Reconciliation contains the payments that will export to QuickBooks. Without Reconciliations payments will not export.
A Reconciliation should be performed at the end of each business day to capture that day's payments and to catch any payment entry errors. If wrong payment amounts are captured on the Reconciliation the wrong amounts will sync to QuickBooks.
INSTRUCTIONS
Please refer to these articles for instructions:
STEP 2 – Configure QuickBooks Settings
Is this step optional or required? Required
2-A: Basic Settings
- Follow the steps in this article to properly configure QuickBooks Online: QuickBooks Online – Application Settings for Sync
2-B: Advanced Settings
Configure these additional settings in QuickBooks Online
- Choose the Gear icon > Company Settings (or Accounts and Settings)
- Click Sales from the menu on the left.
- In the section titled "Sales form content" turn "Custom transaction numbers" On
- Turn "Discount" On

- Click Advanced from the menu on the left
- In the section titled "Automation" turn "Automatically apply credits" Off

- In the section titled "Automation" turn "Automatically apply credits" Off
2-C: Inventory Setting
- If your CoreBridge system has parts or modifiers of type "Inventoried part", the following setting must be enabled.
- Choose the Gear icon > Company Settings (or Accounts and Settings)
- Click Sales from the menu on the left
- In the section titled "Products and services" turn "Track inventory quantity on hand" On.
Once all settings have been addressed, click DONE or click the "X" to close the window.
STEP 3 – Setup Tax Groups and Tax Agencies
Is this step optional or required? Required
READ ME
- Tax Groups and Tax Agencies do not sync to QuickBooks and must be created manually. When new ones are added to CoreBridge or when existing ones change, QuickBooks will need to be updated manually.
- Tax Group names are checked each time a sync is performed. The Tax Group name from CoreBridge must match the Tax Rate Name in QuickBooks. If there isn't a match, or if there is a missing Tax Rate in QuickBooks, the sync will fail. Tax Agency names and rates are not checked. When setting up Tax Rates in QuickBooks be sure that the rate matches CoreBridge. If the rate in QuickBooks does not match the rate from CoreBridge, QuickBooks will calculate sales tax differently than CoreBridge which can cause sync errors and can cause your tax liability in QuickBooks to be erroneous.
- When sales tax rates change, the rate must be changed both in CoreBridge and in QuickBooks so that they match. When there is a rate change, your existing CoreBridge estimates and orders will retain the rate they were originally assigned and new transactions will get the new rate. In order for existing transactions to retain the old rate, CoreBridge creates a new tax record behind the scenes which is the old rate and then assigns the record with the old rate to the existing transactions. The new tax record will have a name starting with "old_" and that new record will not be visible in the management module. If an invoice gets Completed after the rate change and the new record is a Tax Group, the sync will fail when it gets to the invoice step and the name of the missing Tax Rate will be displayed. When this happens you will need to request a tax record listing from CoreBridge support then add the new Tax Rate to QuickBooks which will actually be the old rate.
- Since erroneous tax calculations can occur if rates don't match between CoreBridge and QuickBooks, the CoreBridge sales tax reports should always be used when completing a sales tax form. If there are discrepancies between the CoreBridge and the QuickBooks tax liability report, QuickBooks should be manually updated to match CoreBridge. If QuickBooks calculated tax because the rate was incorrect, each invoice in QuickBooks that synced may need to be manually adjusted.
This paragraph only applies if you were syncing to QuickBooks Desktop then imported to QuickBooks Online.
If you import a QuickBooks Desktop company file to QuickBooks Online that has already been synced from CoreBridge, Tax Rates will already exist in QuickBooks if the Automated Sales Tax feature is not enabled. However, due to name limits in QuickBooks Desktop, the names may be shortened causing the sync to fail because the names in QuickBooks will not match the names in CoreBridge. The shortened name from QuickBooks desktop will need to be changed to the entire name from CoreBridge since QuickBooks Online allows more characters.
INSTRUCTIONS
- Contact CoreBridge support and request a list of all Tax Agencies and Tax Groups on your system.
- The Groups and Agencies visible in CoreBridge are not always a complete listing.
- The Groups and Agencies visible in CoreBridge are not always a complete listing.
- Once you get the report, create matching Tax Rates in QuickBooks using the Tax Group and Tax Agency names from CoreBridge.
- In QuickBooks, click Taxes in the left-hand menu. (These are instructions for the manual tax center, If you are using Automated Tax in QuickBooks these instructions will not match exactly. Please reach out and ask us for assistance if needed.)

- You will see the Sales Tax Center.

- On the right-hand side of the page, there will be a menu named Related Tasks.

- Click "Add/edit tax rates and agencies" to create the records from your CoreBridge report.
This is an example of how to create a combined tax rate (Tax Group with two or more agencies)
GROUP NAME | AGENCY NAME | AGENCY RATE | GROUP RATE |
|---|---|---|---|
State Tax | 10% | ||
County Tax Agency | 6% | ||
City Tax Agency | 4% |
Screenshot from QuickBooks

This is an example of how to create a single tax rate (Tax Group with only one agency)
GROUP NAME | AGENCY NAME | RATE |
|---|---|---|
Out of State Tax | 0% | |
Out of State Agency | 0% |
Screenshot from QuickBooks

Keeping Taxes the Same between CoreBridge and QuickBooks.
- Setting up Detail Sync for the first time
- Name Change or Rate Change in CoreBridge
- Adding a new Group or Agency in CoreBridge
- Changing Agencies in a Group
STEP 4 – Select an Accounting Export Option in Corebridge
Is this step optional or required? Required only if a support agent has not already saved the setting for you.
If an agent has already saved the setting for you, skip this step and proceed to Step 5.
IF YOU HAVE ALREADY SYNCED
If you have already synced with a different accounting application then QuickBooks Online or with a different export method, stop here and contact CoreBridge support. Changing this option after data has been synced will create erroneous data in QuickBooks if a sync is performed with the new setting.
INSTRUCTIONS
If you have been in contact with a support agent this step will probably have been done for you.
- In CoreBridge, navigate to Accounting Module > Accounting Export.
- Select the following options:
- Select Export Type: Sync with Online Application
- Application Name: QuickBooks Online
- Sync Type: Full Data Sync
- Full Sync and Detail Sync are the same things.

- Click the Save button. A warning dialogue may appear. Since you have never synced you can safely click OK.
STEP 5 – Authorize CoreBridge with QuickBooks Online
Is this step optional or required? Required
CoreBridge must be authorized with QuickBooks online to perform Step 6.
READ ME
You must use the default URL assigned to your CoreBridge system. It is in this format: (xxx.corebridge.net). Custom URLs will result in an error.
INSTRUCTIONS
Follow "AUTHORIZING INSTRUCTIONS" in this external article:
LINK: QuickBooks Online - Authorize CoreBridge Sync with QuickBooks
STEP 6 – Confirm and Select Accounts in CoreBridge
Is this step optional or required? Required
This step cannot be completed unless CoreBridge is authorized. (See step 5)
6-A. Confirm/Create accounts
The following accounts need to exist in QuickBooks. Be sure that the accounts exist and the Category Type and Detail Type are set as noted. If an account does not exist or is not set correctly the sync will fail.
- Default Bank Account
- UK QuickBooks only: Cash at bank and in hand
- The General Ledger bank account must be a parent account.
- Primary A/R account, one for each CoreBridge location.
- UK QuickBooks only: Debtors
- A/R Accounts should never be changed once the sync is set up. Don't change the name, account number, or hierarchy in QuickBooks. Don't change the account in CoreBridge to a different A/R account. Changes to A/R accounts may create a great deal of extra labor in QuickBooks to manually clean up transactions. You may need to go through every transaction where the account changed. Just changing it back to how it was set up initially won't correct the issues that happened during the change period.
- Default income account when none is assigned
- Default COGS account when none is assigned
- UK QuickBooks only: Cost of sales
- Cost of Goods Sold default account must have Supplies and Materials as the Detail Type (see screenshot from QuickBooks)

- Default asset account when none is assigned.Asset accounts are used on Purchase Orders
- Category Type: Other Current Assets
- UK QuickBooks only: Current assets
- Detail Type: Inventory (see screenshot from QuickBooks)
- UK QuickBooks only: Stock

- Account for Customer Refunds
- Recommended account is your Default Bank Account
- Recommended account is your Default Bank Account
- Account for Bad Debt
- Bad Debt must be Category Type "Expenses" and not "Other Expense" (see screenshot from QuickBooks)

- Bad Debt must be Category Type "Expenses" and not "Other Expense" (see screenshot from QuickBooks)
6-B. Select Accounts
INSTRUCTIONS
- In CoreBridge navigate to the Accounting Module, then to the Accounting Export page, then click the Account Setup tab.
- Click the Refresh button. This process pulls in existing accounts from QuickBooks. The process can take a minute or longer.

- Use the dropdowns to select your QuickBooks accounts. The accounts that need to be selected are the ones you just Confirmed/Created.

- BANK ACCOUNT: The General Ledger bank account must be a parent account. If the bank account is a child account, you will be able to map it here but the related transactions will fail to sync.
- BANK ACCOUNT: The General Ledger bank account must be a parent account. If the bank account is a child account, you will be able to map it here but the related transactions will fail to sync.
- If Refresh doesn't pull in a required account, any missing account must be set up in QuickBooks. You can use the "circle with arrows" icon to pull in individual accounts.

- When all accounts have been selected, click Save Account Setup.

- The Sync Start Date field can remain empty. It will be set on your 1st Sync Meeting.
If saving settings results in failure, Payment Types should be created manually in QuickBooks.
- Cash
- Check
- Credit Card (online)
- Credit Card (offline)
- EFT
- Other
- Bad Debt
- (any other custom types in the Management Module in CoreBridge)
6-C. Sync Vendor PO's
(optional)
- If your CoreBridge subscription comes with the Purchasing Module and your version of QuickBooks supports Purchase Orders, your CoreBridge purchase orders will sync to QuickBooks.
 INSTRUCTIONS
- 1) Uncheck the box to prevent purchase orders from syncing OR Check the box to allow purchase orders to sync.
- 2) Click Save Account Setup.
STEP 7 – Match Income & Cost of Goods Sold Accounts
Is this step optional or required? Required
READ ME
The only accounts needed for the sync are the accounts in CoreBridge. Be sure not to add your entire Chart of Accounts to CoreBridge.
If there is an account in CoreBridge that does not exist in QuickBooks, it will be created automatically in QuickBooks during your 1st sync so there is no need to add it manually. The new account in QuickBooks will be created exactly as displayed in CoreBridge (account number, account name, hierarchy). If you want to have an account created automatically, any parent account noted in CoreBridge will need to either be created by the sync or must already exist in QuickBooks. If you prefer to add an account manually to QuickBooks, be sure it matches exactly to CoreBridge.
ACCOUNT NAMING AND STRUCTURE
- Special characters may cause sync errors. Some examples are $, &, and quote symbols. Please use only letters and numbers for account names. If a special character causes a sync error, the account name will need to be changed in both CoreBridge and QuickBooks for the sync to be successful.
- The name "Shipping" should not be used as an account name. Names like "Shipping Income" or "Shipping Expense" can be used instead.
- The name "Freight" should not be used as an account name. Names like "Freight Income" or "Freight Expense" can be used instead.
- Accounts can have 3 levels:
- Parent > Child > Child
- If your existing Income and COGS accounts that will be used in CoreBridge have more than 3 levels please adjust them accordingly in QuickBooks before matching them to CoreBridge.
- Each account must have a unique account number and a unique name. Numbers and names cannot be the same between Income accounts and COGS accounts. If you want the sync to create an account for you in QuickBooks during the 1st sync, be sure that an account doesn't already exist in QuickBooks with the number or name of the account that will be created.
INSTRUCTIONS
DUPLICATE ACCOUNTS
Review your QuickBooks chart of accounts to check for duplicate account names. Each account in QuickBooks should have a unique name. If there is an account in CoreBridge with the same name as two or more accounts in QuickBooks with the same name, the sync may fail or may change your chart of accounts in QuickBooks to something you aren't expecting. For Example:
- One CoreBridge Account: 4000 Banner Income
- Two QuickBooks Accounts: 4000 Banner Income, 4500 Banner Income
- You will need to change 4500 so that is has a unique name
ACCOUNT MATCHING
- Match Income and COGS accounts between CoreBridge and QuickBooks.
- Account number, account name, account hierarchy, and account type must match exactly.
INCOME ACCOUNTS
- The QuickBooks account type needs to be "Income". Using type "Other Income" will create sync errors causing data to not export.
- If you are syncing Parts or Modifiers of type "Inventoried Part", Detail Type in QuickBooks must be "Sales of Product Income".
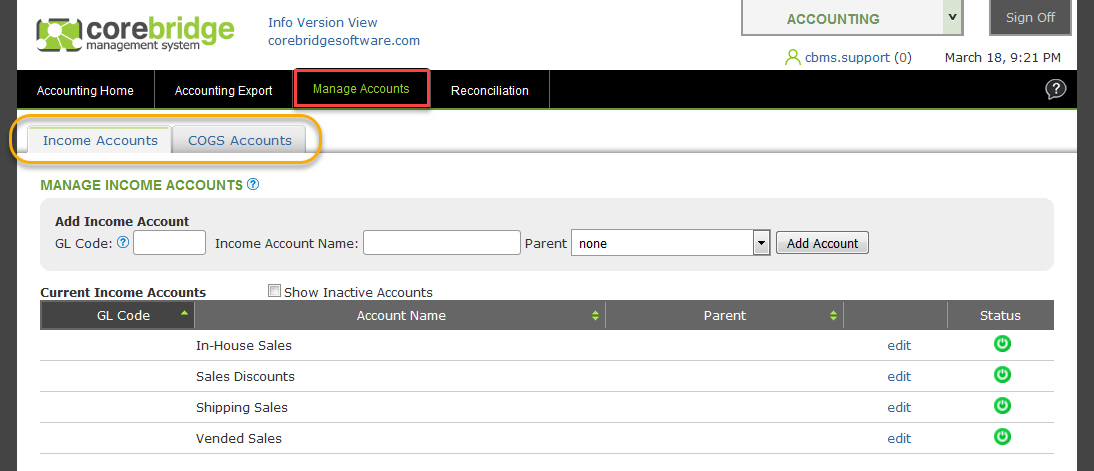
- In CoreBridge, navigate to Accounting Module > Manage Accounts > Income Accounts tab.
COGS ACCOUNTS
- The QuickBooks account type needs to be "Cost of Goods Sold". Using type "Expense" will create sync errors causing data to not export.
- Costs from CoreBridge do not sync but the accounts themselves will sync because they need to be used with the items that will be created in QuickBooks from your CoreBridge parts and modifiers.
- In CoreBridge, navigate to Accounting Module > Manage Accounts > COGS Accounts tab.
WORKING WITH ACCOUNTS
- The column headings can be used to sort accounts. If the accounts have account numbers, try clicking GL Code once or twice to put the accounts in number order. If the accounts don't have numbers, sorting by Account Name may make the matching process easier.
- Once sorted, start with the first account in CoreBridge. Compare it to QuickBooks. If the CoreBridge account matches exactly to QuickBooks move on to the next account in CoreBridge. (You don't want to start with the first account in QuickBooks because all of your accounts in QuickBooks don't need to be in CoreBridge)
- If the CoreBridge account represents an account in QuickBooks but it doesn't match exactly, change the account in either QuickBooks or CoreBridge to get them to match.
- If you are a Franchisee, CoreBridge is populated with the Franchisor master Chart of Accounts so any change may need to be made in QuickBooks.
- The goal is to get the account to match perfectly between CoreBridge and QuickBooks.
- If a CoreBridge account needs to be changed, click edit, make any needed changes, then click save before moving to the next account.
- If the account being matched is a child account in QuickBooks be sure to select the parent account in CoreBridge so that the account hierarchy matches. If a parent account does not exist in CoreBridge it must be created.
- To create a new account use this section of the page:
- If you are a Franchisee, your accounts may be locked preventing new accounts from being created.

STEP 8 – Invoice Prefix & Numbering Format
Is this step optional or required? Optional if QuickBooks does not have existing invoices.
READ ME
If your QuickBooks has customer invoices this step must be completed so that CoreBridge invoices will have different numbers than QuickBooks. If invoice numbers are the same between CoreBridge and QuickBooks the CoreBridge invoices will fail to sync.
INSTRUCTIONS
- In QuickBooks
- Reports > Invoice List
- Select a date range that will show your most recent invoices.
- If necessary, export the report to Excel and sort by NUM.
- In CoreBridge view your Invoice Prefixsetting:
- Management Module > Locations > (select a location) > Location & Company
- Make any needed change then click Save Changes.

- In CoreBridge view your invoice numbering:
- Management Module > Global Settings > Pricing Settings
- Make any needed change then click Save Settings.

STEP 9 – Review Employee Names
READ ME
If your QuickBooks has Employees this step must be completed so that there are no conflicting records. If you have sold to an Employee, that Employee may have a Customer account in CoreBridge.
If there is an Employee in QuickBooks with the same name as a Customer in CoreBridge the Customer will fail to sync which will also cause invoices to not sync.
INSTRUCTIONS
Compare your Employee list from QuickBooks against Customers in CoreBridge. If there is a match, the name will need to be changed in either CoreBridge or in QuickBooks so that it doesn't match.
STEP 10 – Review Customer Names
Is this step optional or required? Optional if QuickBooks does not have customers.
If your customers were imported into CoreBridge from QuickBooks or another POS system you can usually skip this step. If any customer names were changed after the import happened you may get duplicate customers in QuickBooks which can be merged later if needed.
READ ME
If your QuickBooks has customers we highly recommend completing this step. If a customer exists in both QuickBooks and CoreBridge but the names do not match each other exactly, the sync will create a new customer in QuickBooks from the customer record in CoreBridge. All new transactions will sync to the new customer record. That will leave QuickBooks with duplicate customers:
- The original customer with the transactions that were recorded in QuickBooks
- The new customer with only the transactions from CoreBridge
INSTRUCTIONS
Compare all customers between CoreBridge and QuickBooks to be sure that the name is the same in both systems. (This includes spaces, dashes, and any other character)
STEP 11 – Review Vendor Names
Is this step optional or required? Optional if QuickBooks does not have vendors.
If your CoreBridge subscription does not include the Purchasing Module skip this step and proceed to Step 12.
READ ME
If your QuickBooks has vendors we highly recommend completing this step. Vendors from the Purchasing Module will sync to QuickBooks. If a vendor exists in both QuickBooks and CoreBridge but the names do not match each other exactly, the sync will create a new vendor in QuickBooks from the vendor record in CoreBridge. All new transactions will sync to the new vendor record. That will leave QuickBooks with duplicate vendors:
- The original vendor with the transactions that were recorded in QuickBooks.
- The new vendor with only the purchase orders from CoreBridge.
INSTRUCTIONS
Compare all vendors between CoreBridge and QuickBooks to be sure that the name is the same in both systems. (This includes spaces, dashes, and any other character)
STEP 12 – Review Items
READ ME
If your QuickBooks has items we highly recommend completing this step. Part and modifiers from CoreBridge will sync to QuickBooks as items. The items will be used for Invoices and Purchase Orders. If an item exists in both QuickBooks and CoreBridge but the names do not match each other exactly, the sync will create a new item in QuickBooks from the part or modifier record in CoreBridge. All new transactions will use the new item record. That will leave QuickBooks with duplicate items:
- The original item with the transactions that were recorded in QuickBooks.
- The new item with only the transactions from CoreBridge.
In addition to the names needing to match, the Type needs to match as well:
- Inventory
- Non-Inventory
- Service
If the names match but the type doesn't match, the sync will attempt to update the item type in QuickBooks so that it matches CoreBridge. If there is activity on the item in QuickBooks that prevents the type from being changed, the sync will fail. That will result in the item not syncing and all Invoices and Purchase Orders that use that item will also fail.
INSTRUCTIONS
B. If you use Closing Dates in QuickBooks, please review this article: LINK: QuickBooks Detail Sync - Closing Date
C. Compare all items in QuickBooks to parts and modifiers in CoreBridge. The following information should be the same in both QuickBooks and CoreBridge:
- Name (This includes spaces, dashes, and any other character)
- Type
- Income account
- COGS account (If the item in QuickBooks has inventory transactions, and the sync tries to change the account in QuickBooks, the item may fail if QuickBooks does not allow the change to be made. This happens because QuickBooks isn't allowing the beginning balance to change. If that happens the name will need to be changed in QuickBooks so that the sync can create a new item from the record in Corebridge).
STEP 13 – In-Store Credit (to be completed after the sync)
Is this step optional or required? Required
READ ME
Once your 1st sync has been completed, be sure to perform this step in QuickBooks so that In-Store Credit given in CoreBridge will post to QuickBooks.
An In-Store Credit item will be created automatically in QuickBooks during the 1st sync.
- You may reassign the account associated with the item to an Expenses account
- Depending on the account type assigned, Income or Expense, it could cause a difference in sales reports between CoreBridge and QuickBooks.
INSTRUCTIONS
- Edit the In-Store Credit item in QuickBooks online.
- Enable "I sell this product/service to my customers".
STEP 14 – Notify Support That All Setup Steps Have Been Completed
Once the entire setup has been completed, notify support by replying back to your "sync setup" ticket.
"The sync setup has been completed and I would like to proceed to the next step."
The agent assigned to your ticket will review your system to ensure that you have a successful First Sync. If any issues are found during the review that will cause the sync to fail, the agent will let you know what the issues are so that they can be fixed. Once the review is successful the agent will send a scheduling link that you will use to arrange your First Sync meeting.
The 1st Sync to QuickBooks Online will be performed with a CoreBridge Support specialist on the scheduled meeting.
We do not recommend performing a first sync on your own.