In CoreBridge, Part Categories and Part Groups serve different purposes in organizing and managing your Parts. Categories make it easier for users to locate Parts throughout the system, and a single Part can belong to multiple categories. Groups, on the other hand, are used within the Management Module to apply shared settings - such as discounts, margins, setup fees, and income accounts—to multiple parts at once. Each part can belong to only one group, and when it’s added, it automatically inherits that group’s common settings. Understanding how these two features work together helps you organize parts efficiently while maintaining consistent pricing and management controls.
Table of Contents
Part Categories
Part Categories help organize your parts throughout the CoreBridge system, making them easier for users to locate and manage. A single Part can belong to multiple categories, allowing for flexible organization and quicker searches across modules. Common examples include Cut Vinyl, Print Vinyl, Envelopes, Banners, Electrical, Frames, Tradeshow, Vehicle, Decals, and Services.
For more information on Part Categories, please see Part Categories.
Managing Categories
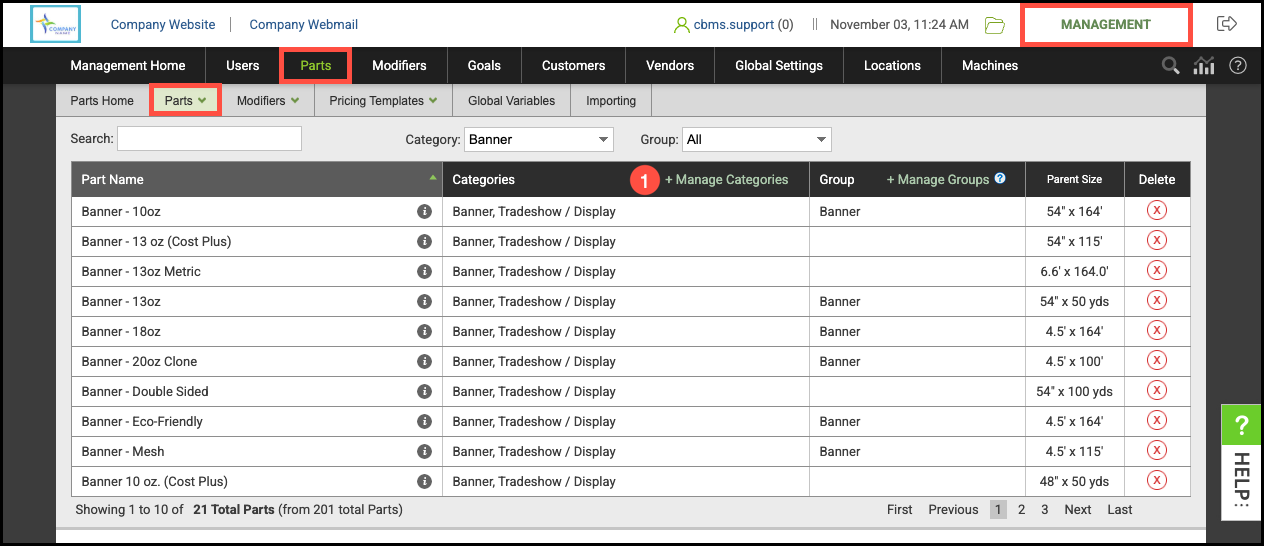
Navigate to the Management Module / Parts / Manage Parts.
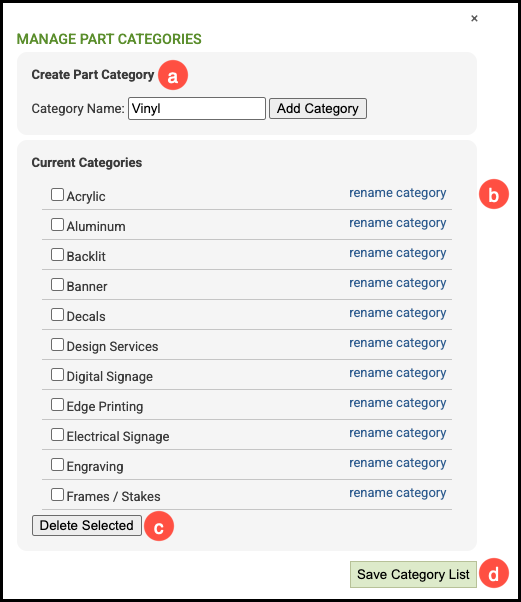
1. Click Manage Categories.
a. Part Categories can be created by typing a name in the field and clicking Add Category.
b. Categories can be renamed at any time by clicking here.
c. Part Categories can be deleted by selecting the appropriate group and clicking here.
d. Any changes made can be saved here.
Note: You can filter and sort by categories when creating Orders, viewing production queues, or generating reports.

Part Groups
Part Groups are used within the Management Module to apply shared settings to multiple Parts at once. Each Part can belong to only one group, which helps maintain consistent pricing and configuration across similar items. Common examples include Intermediate Vinyl, Premium Vinyl, Reflective Vinyl, Installation, and Design.
The settings managed through groups appear in the tabbed section below the Part name list. When a Part is added to a group, it automatically inherits that group’s shared settings - overriding any previous individual settings. This ensures uniformity while reducing manual setup time.
For more information on Part Groups, please see Part Groups.

Managing Groups
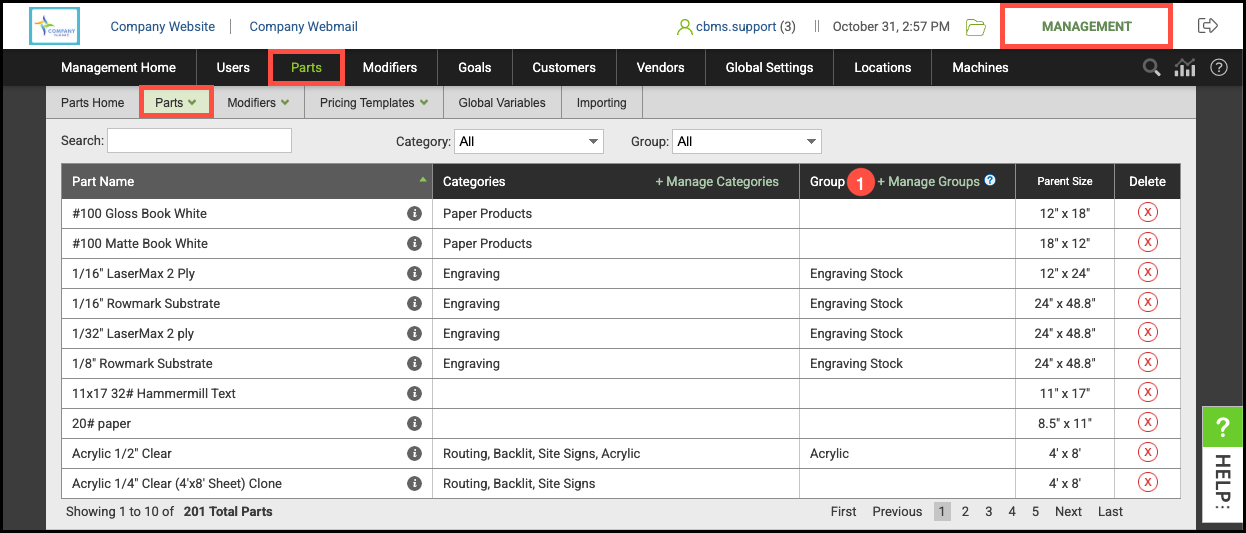
Navigate to the Management Module / Parts / Manage Parts.
1. Click Manage Groups.
a. Part Groups can be created by typing a name in the field and clicking Add.
b. Groups can be renamed at any time by clicking here.
c. Part Groups can be deleted by selecting the appropriate group and clicking here.
d. Any changes made can be saved here.
